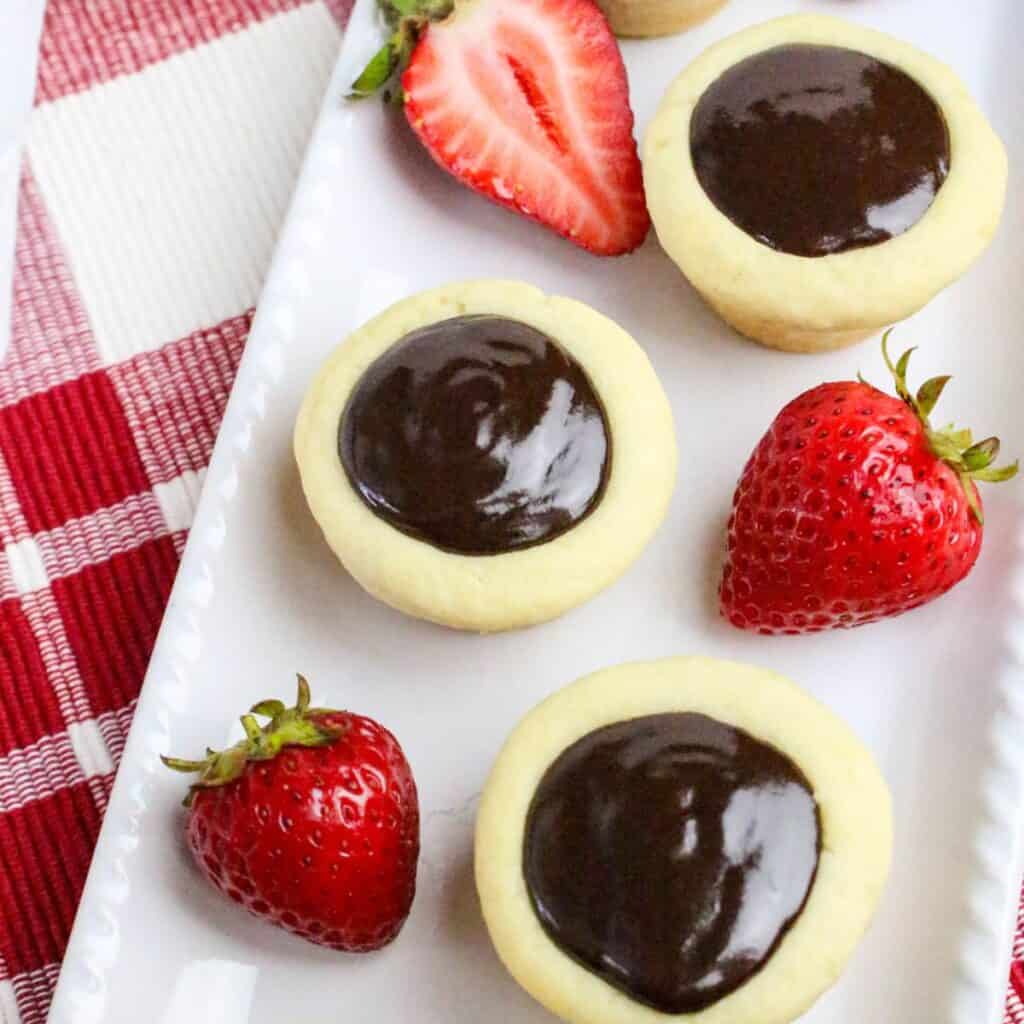
No bake Mini Cheesecakes
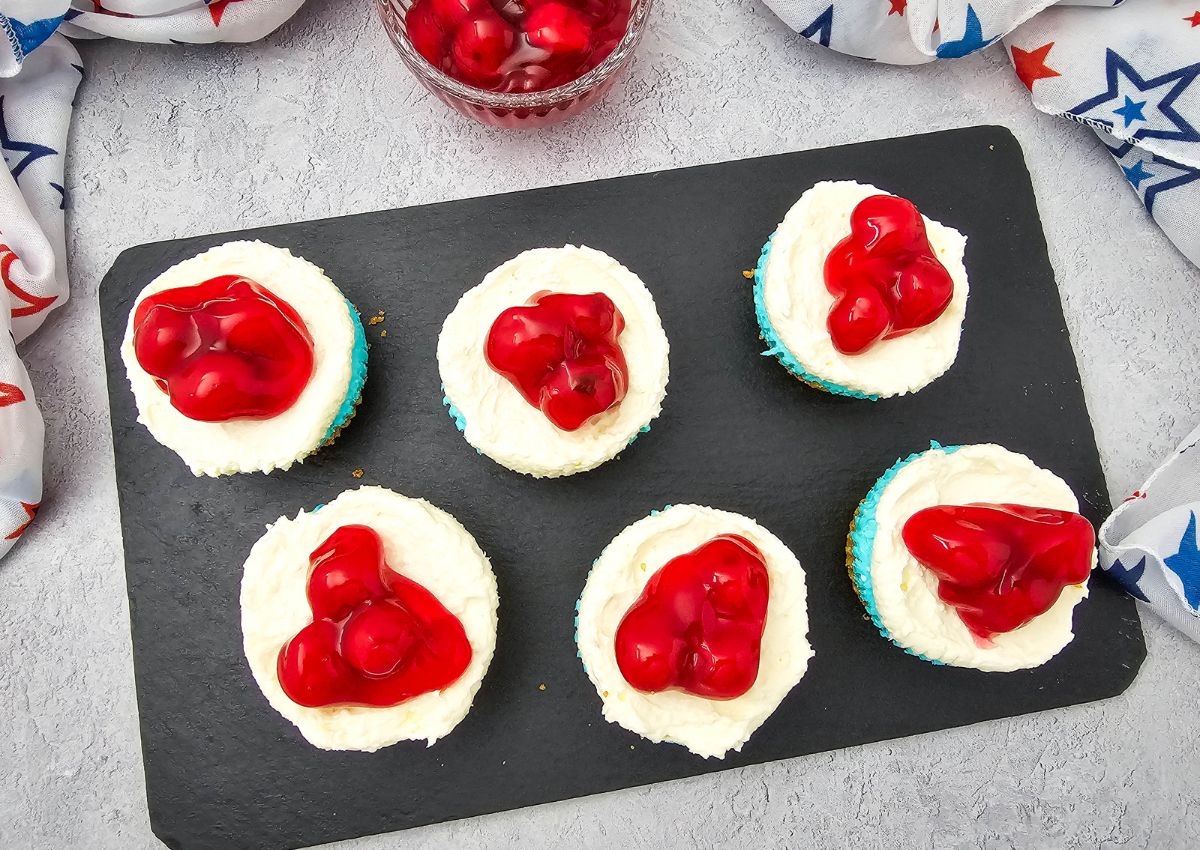
These No-Bake Mini Cheesecakes are just what you need! Decorated with red, white, and blue, they’re a fun and delicious treat, perfect for the 4th of July or any patriotic event. With a creamy cheesecake filling and a crunchy graham cracker crust, you don’t need to turn on the oven to make this easy dessert!

This recipe is simple, fun, and great for any occasion. Since there’s no baking required, you can keep your kitchen cool, even on hot summer days. These cute mini cheesecakes are made in a muffin pan, so everyone gets their little dessert. Plus, you can change the colors and decorations to match any holiday or theme. The red, white, and blue make them perfect for celebrations like Independence Day or Memorial Day.
If you love bite-sized desserts, you’ll enjoy recipes like mini cupcakes, cookie bars, and no-bake pies. These easy treats are perfect for sharing and save you time while being super tasty!
Ingredients
Here’s a quick look at the ingredients to create these gorgeous mini cheesecakes. The full measurements can be found in the recipe card below.
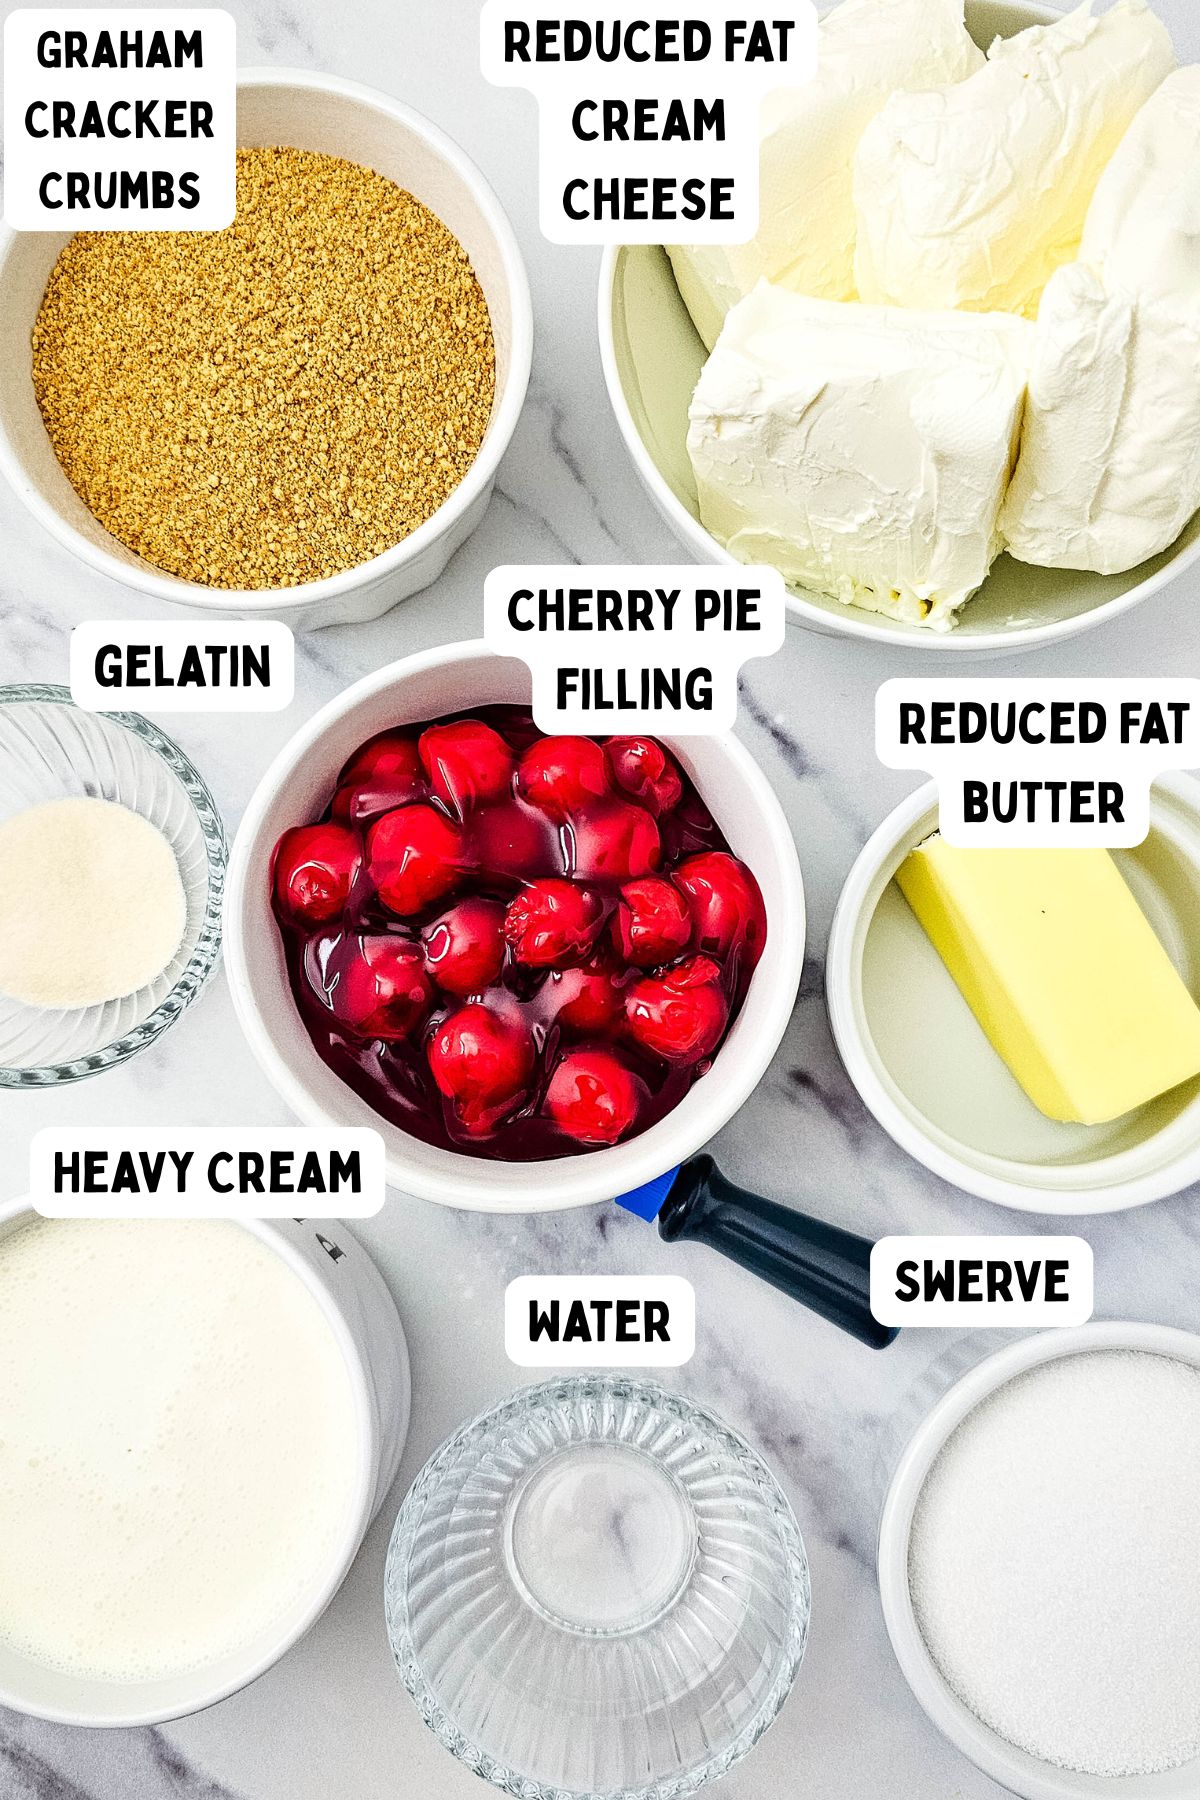
- Graham Cracker Crumbs: The base of your cheesecakes starts with crushed graham crackers combined with a little sweetness and butter for the perfect graham cracker crust.
- Reduced-Fat Butter: Helps bind the graham cracker crumbs, providing that buttery, crunchy goodness. Reduced-fat butter keeps the base lighter without sacrificing flavor.
- Reduced-Fat Cream Cheese: Make sure your cream cheese is at room temperature, so it blends easily.
- Gelatin: This is the secret to giving the cheesecake filling its structure, ensuring it sets just right.
- Water: Used to dissolve the gelatin, allowing it to evenly mix into your filling.
- Heavy Cream: Whip it until stiff peaks form for an ultra-light texture that’s dreamy and satisfying.
- Food Coloring: Red and blue food coloring are optional, but make these cheesecakes especially festive and colorful.
- Cherry Pie Filling: This vibrant topping adds the perfect red hue and fruity sweetness, tying everything together beautifully!
See recipe card for quantities.
How to Make No bake Mini Cheesecakes
This is a quick overview of the steps. See the Recipe card below for the rest.

Step 1: Prepare a muffin pan with liners and combine graham cracker crumbs with melted butter in a bowl.

Step 2: Divide the mixture into the muffin tin cavities and press down to form a crust.

Step 3: Gradually add heavy cream to the cream cheese mixture, beating on low speed until combined.

Step 4: Mix gelatin with cold water in a microwave-safe bowl, heat for 10 seconds until clear, then stir. Add the warm gelatin mixture to the cheesecake filling and blend well.

Step 5: Divide the cheesecake mixture into two bowls. Add blue food coloring to one bowl and mix until the color is uniform. Transfer each color into a separate piping bag.
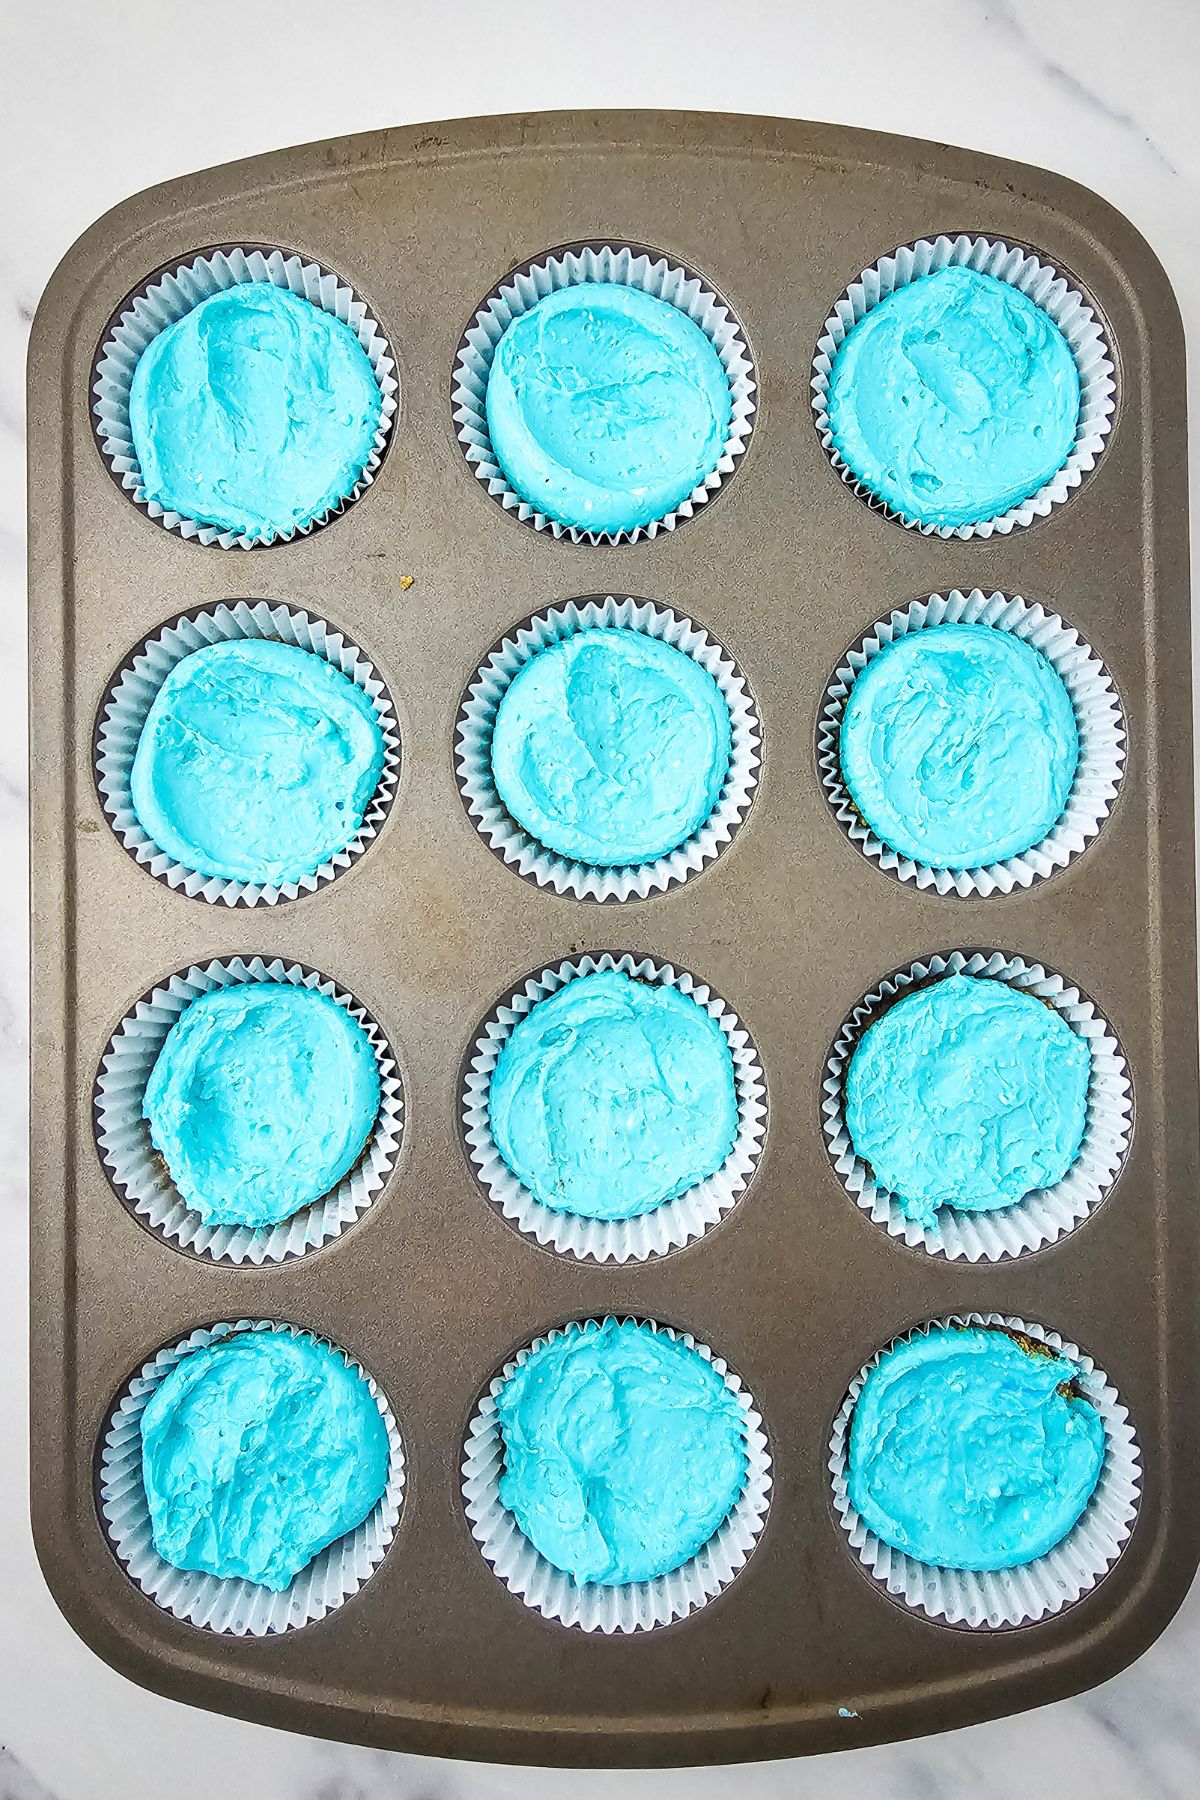
Step 6: Pipe the blue filling over the graham cracker crusts and spread gently with a spoon.
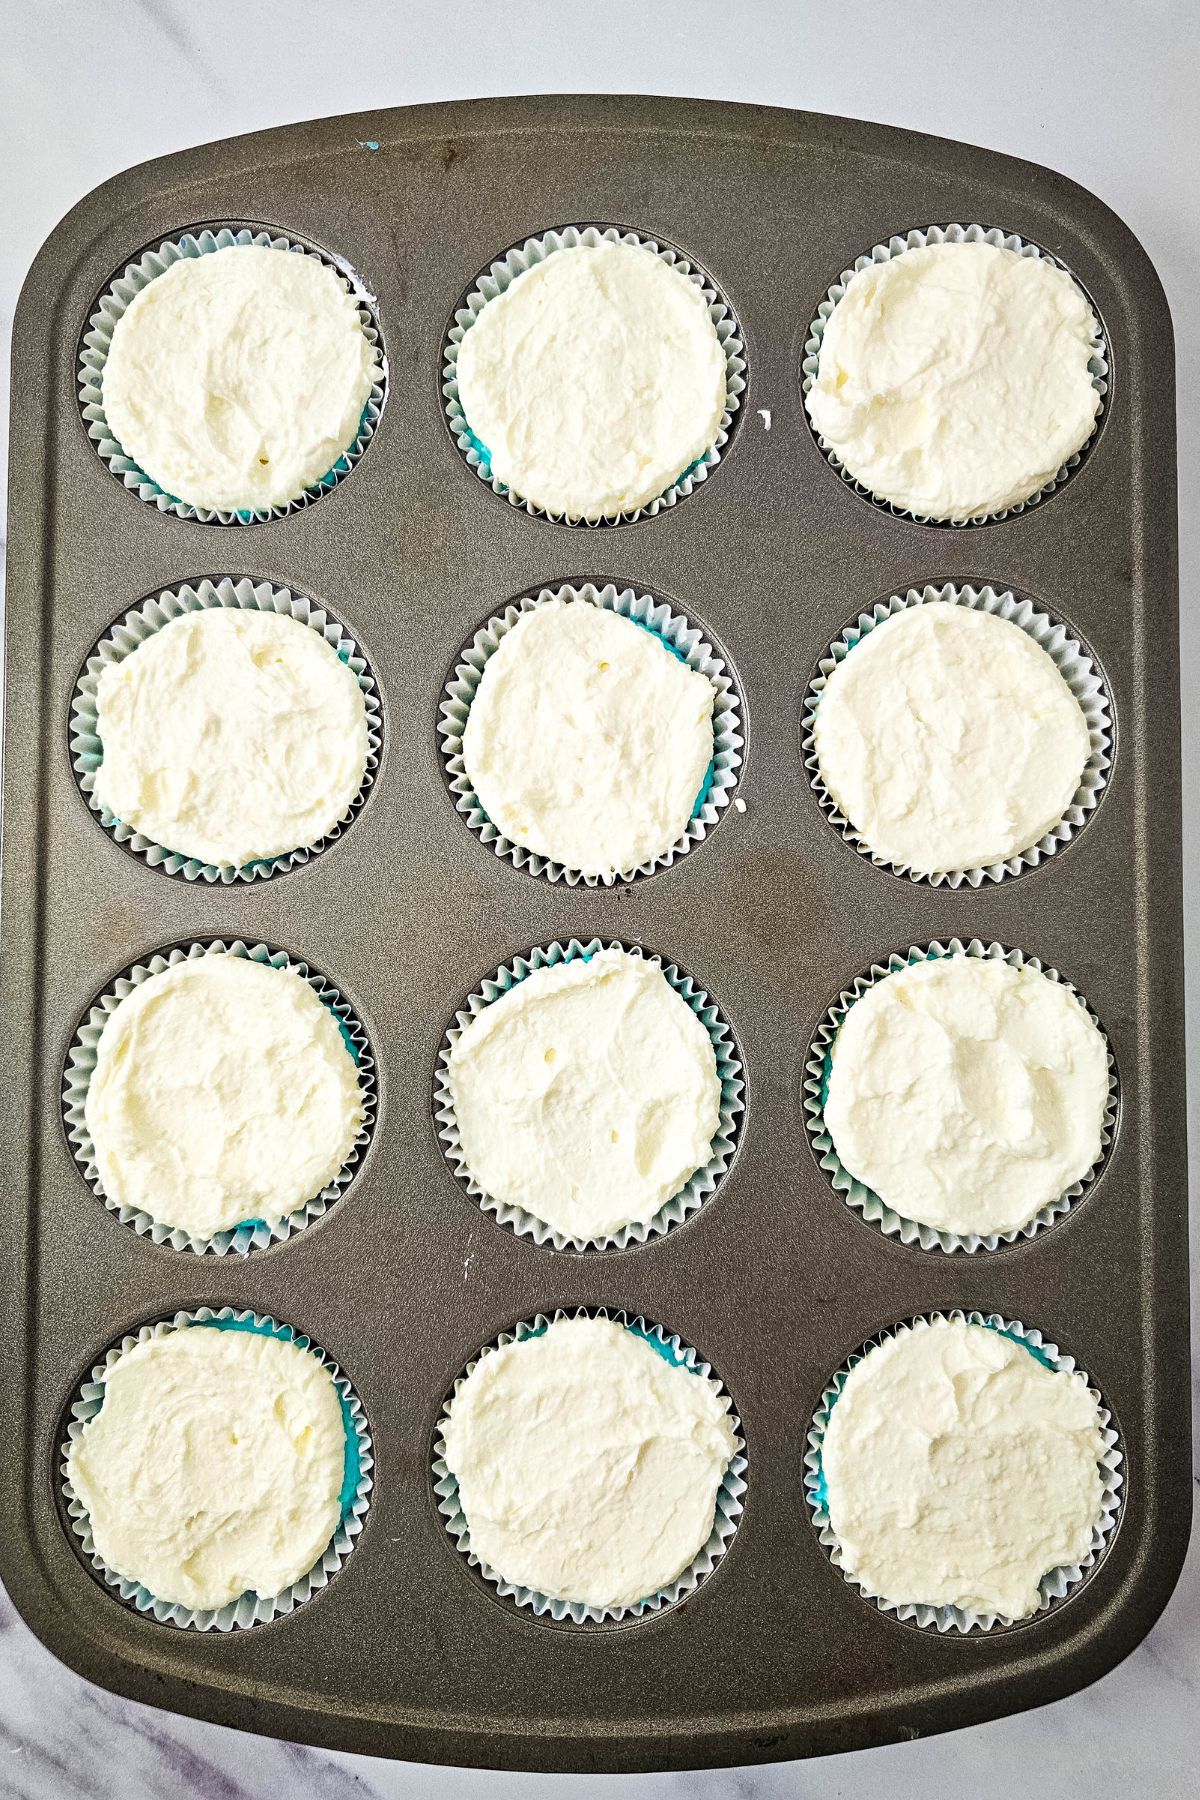
Step 7: Repeat with the white layer, flattening the top as much as possible.

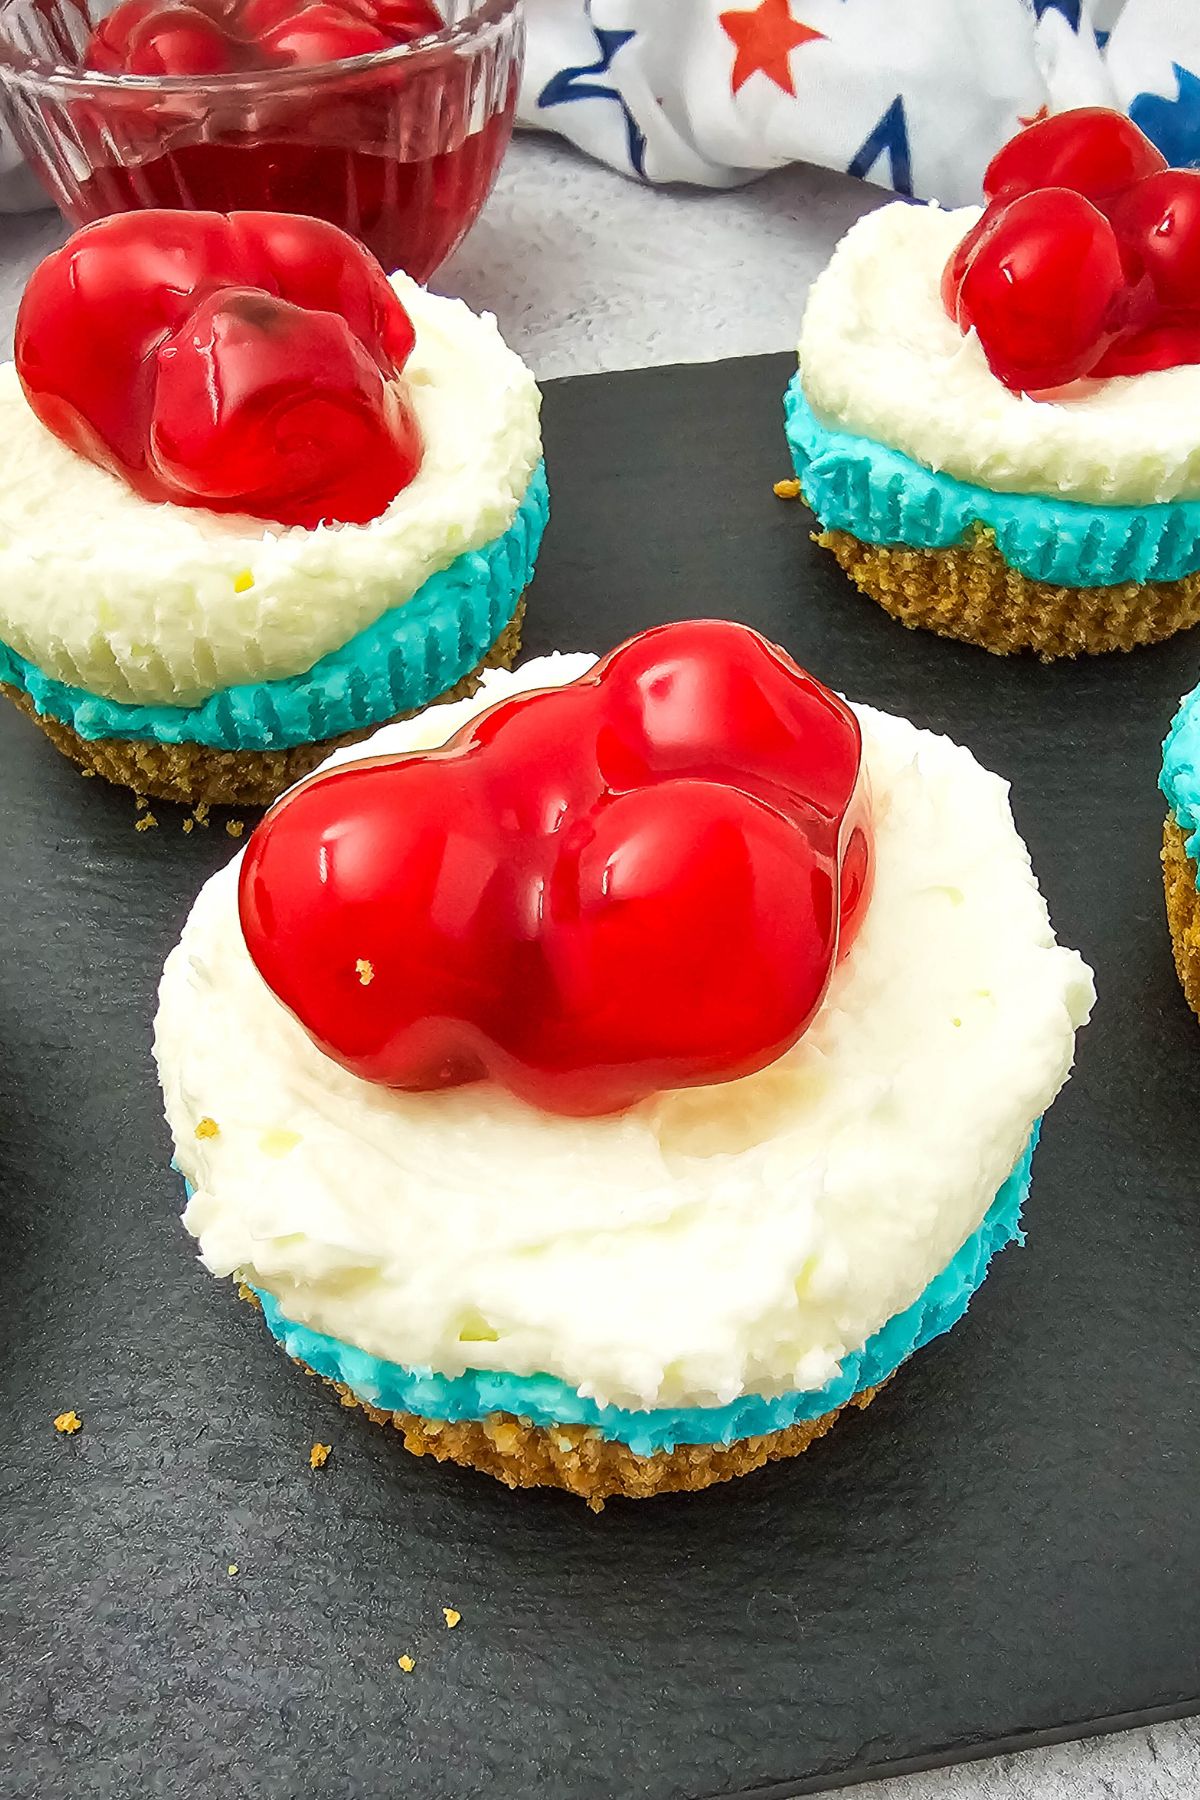
Step 8: Freeze the muffin tin to set the mini cheesecakes and top with cherry pie filling before serving.
Variations and Substitutions
These No Bake Mini Cheesecakes are easy to customize!
- Gluten-Free: Use gluten-free graham crackers for the crust.
- Healthier Option: Swap out reduced-fat cream cheese for full-fat if you’re craving extra richness or opt for Greek yogurt for a tangy twist.
- Fruit Topping Swap: Don’t like cherries? Substitute with blueberry, raspberry, or strawberry pie filling.
- Change the Theme: Not celebrating a patriotic holiday? Skip the food coloring or adjust it to suit your event (e.g., green and red for Christmas).
Storage
- Storage – Place leftovers in an airtight container and keep them refrigerated for up to 4 days.
- Freezing – These cheesecakes freeze beautifully! Once they’ve set, wrap each one tightly in plastic wrap and store in a freezer-safe container for up to 3 months. Simply thaw overnight in the fridge before serving.
- Reheating – No reheating is required! Serve your mini cheesecakes chilled straight from the fridge.
💡 Pro Tips
- If you don’t have a muffin pan, you can use a cupcake pan or even a mini tart pan to make these mini cheesecakes. Just be sure to line them with parchment paper for easy removal!
- Want to add a little extra flavor to your crust? Try using crushed Oreos, graham crackers, or chocolate wafer cookies instead of vanilla wafers.
- For an added burst of color and flavor, top each mini cheesecake with fresh fruit before serving. Berries, sliced peaches, and mango all make great options.
✨Serving Suggestions
- Breakfast: Pair these mini cheesecakes with fresh fruit salad, yogurt parfaits, or a selection of pastries like croissants or danishes for a light and elegant morning spread.
- Lunch: Serve alongside a summer-inspired menu with Spinach and Mozzarella Quiche, mixed green salads, or avocado toast for a balanced and satisfying midday meal.
- Dinner: These cheesecakes would make a great dessert after a dinner of Baked Salmon with Mayonnaise, roasted vegetables, or pasta dishes like fettuccine alfredo or lasagna.
- Snacks or Tea Time: Offer them finger sandwiches, scones, or a cheese platter for a refined snack or afternoon tea.
- Cocktail Hour: Pair them with savory appetizers like Chicken Pockets, bruschetta, stuffed mushrooms, or Charcuterie Skewers to balance the sweet and savory flavors.
FAQ
Absolutely! A food processor will give you perfectly uniform graham cracker crumbs in seconds. If you don’t have one, placing the crackers in a resealable bag and crushing them with a rolling pin works just as well.
Yes, the gelatin acts as a stabilizer and helps the cheesecake set firmly. For a vegetarian version, you can try agar as a substitute.
A standard-size muffin pan works perfectly for this recipe. Silicone pans make removing the cheesecakes easier without needing liners, but metal pans lined with cupcake wrappers are just as effective.

No Bake Mini Cheesecake
Equipment
- Muffin pan
- Muffin liners
- Small bowl
- Large bowl
- Spoon
- Electric mixer (medium-high and low speed settings)
- Microwave-safe bowl
- Piping bags
- Small spoon
Ingredients
- 1 cup graham cracker crumbs
- ¼ cup reduced-fat butter melted
- 16 ounces reduced-fat cream cheese softened
- ½ cup Swerve
- 0.25 ounce packet unflavored gelatin
- 2 tablespoons cold water
- 1 cup heavy cream
- Blue food coloring
- 1 cup Cherry pie filling
Instructions
- Prepare a muffin pan with liners.
- Combine the graham cracker crumbs and melted butter in a small bowl.
- Divide the crumb mixture between the muffin tin cavities and gently press down with a spoon to form the crust.
- Beat the cream cheese and sugar in a large bowl on medium-high speed until smooth and creamy.
- Slowly add the heavy cream to the cream cheese mixture, and beat it on low speed.
- Add the gelatin and cold water to a microwave-safe bowl and heat for 10 seconds or so until you have a clear liquid. Give it a good stir, then add the warm gelatin mixture to the bowl of cheesecake filling, and stir until well combined.
- Divide the mixture between 2 bowls and add blue food coloring to one bowl. Stir until a solid color has formed. Add each color to a separate piping bag.
- Pipe blue on top of the Graham cracker crusts, then gently spread from the inside out with a small spoon. The mixture will be thick, so spreading is necessary.
- Repeat with the white layer, making sure to flatten the top as best you can.
- Put the muffin tin in the freezer for 2 hours to allow the cheesecakes to set.
- Unmold (unwrap if desired), then top with cherry pie filling once ready to serve.
Disclaimer:
Any nutritional data I provide is an approximation and actual dietary information can vary based on ingredients and proportion sizes.