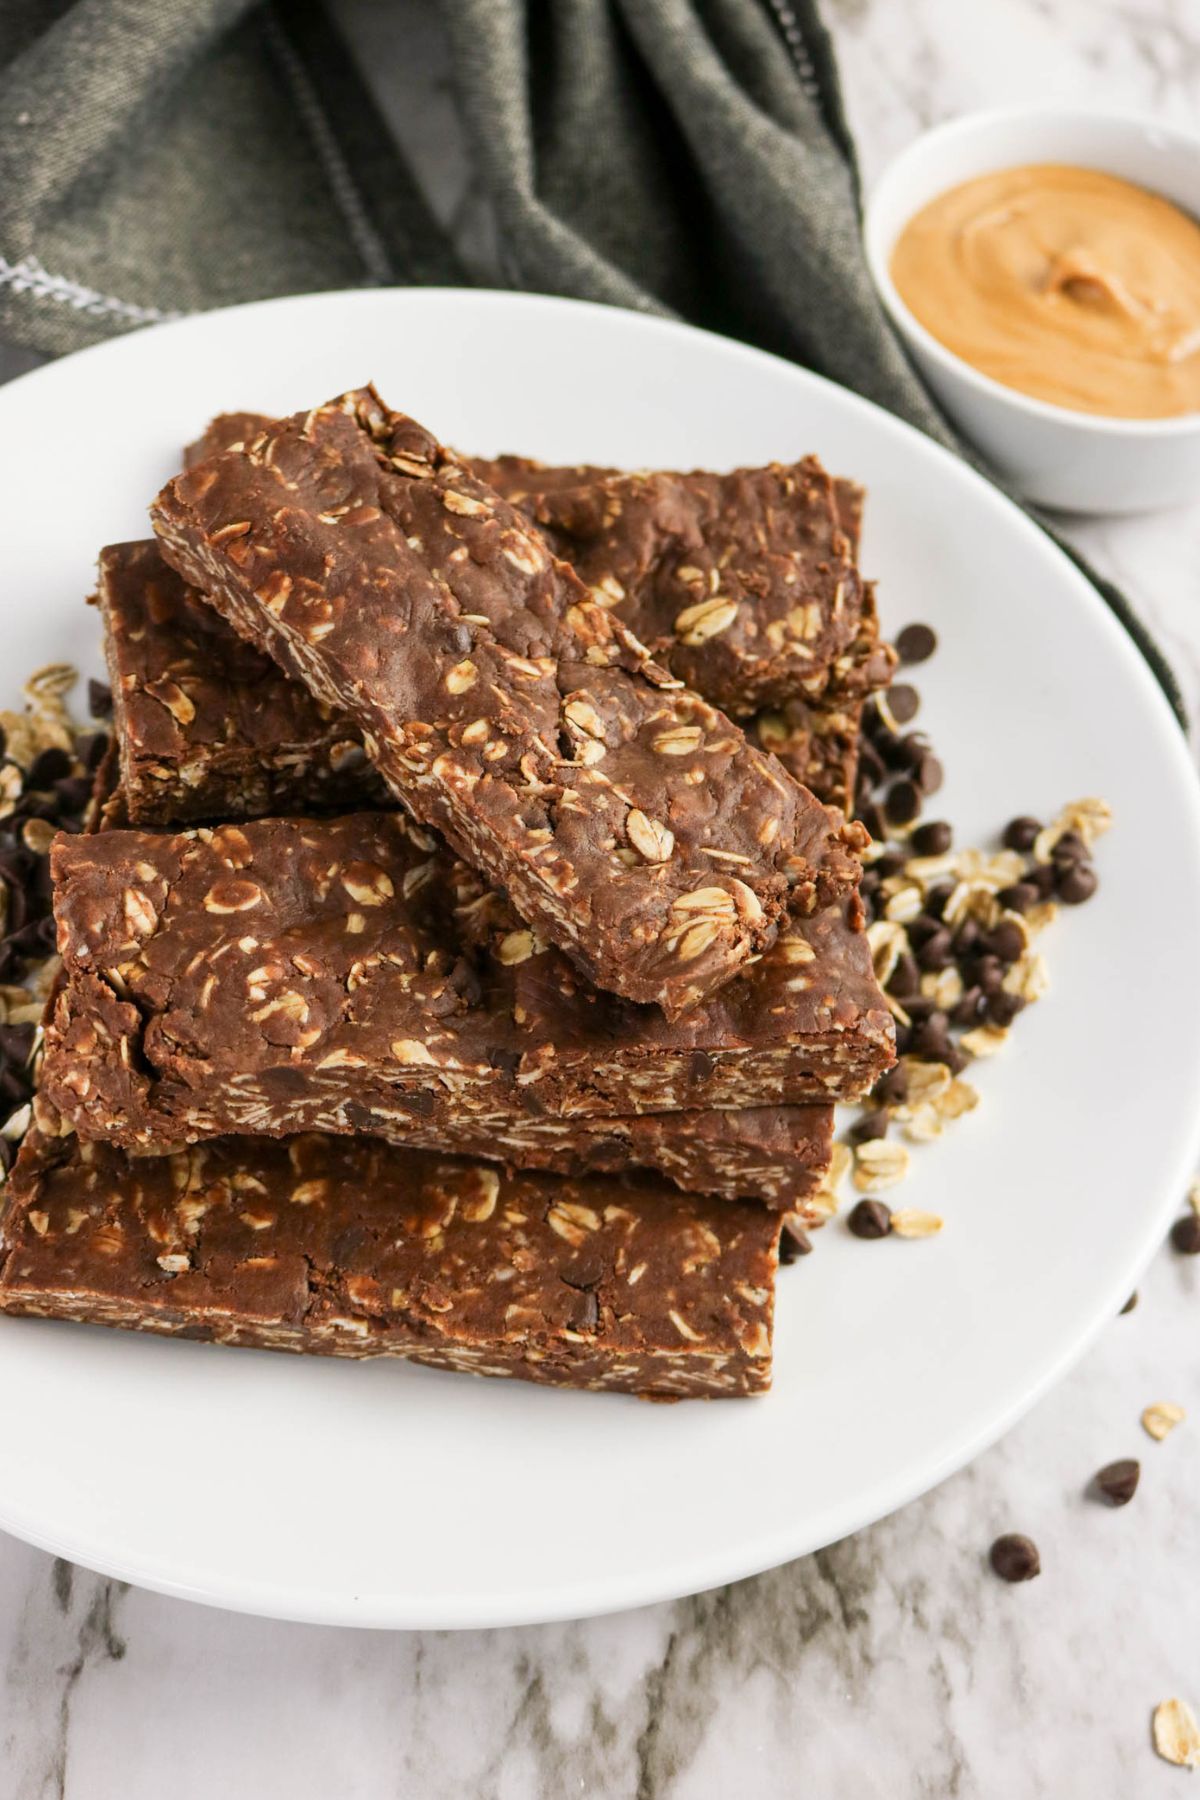
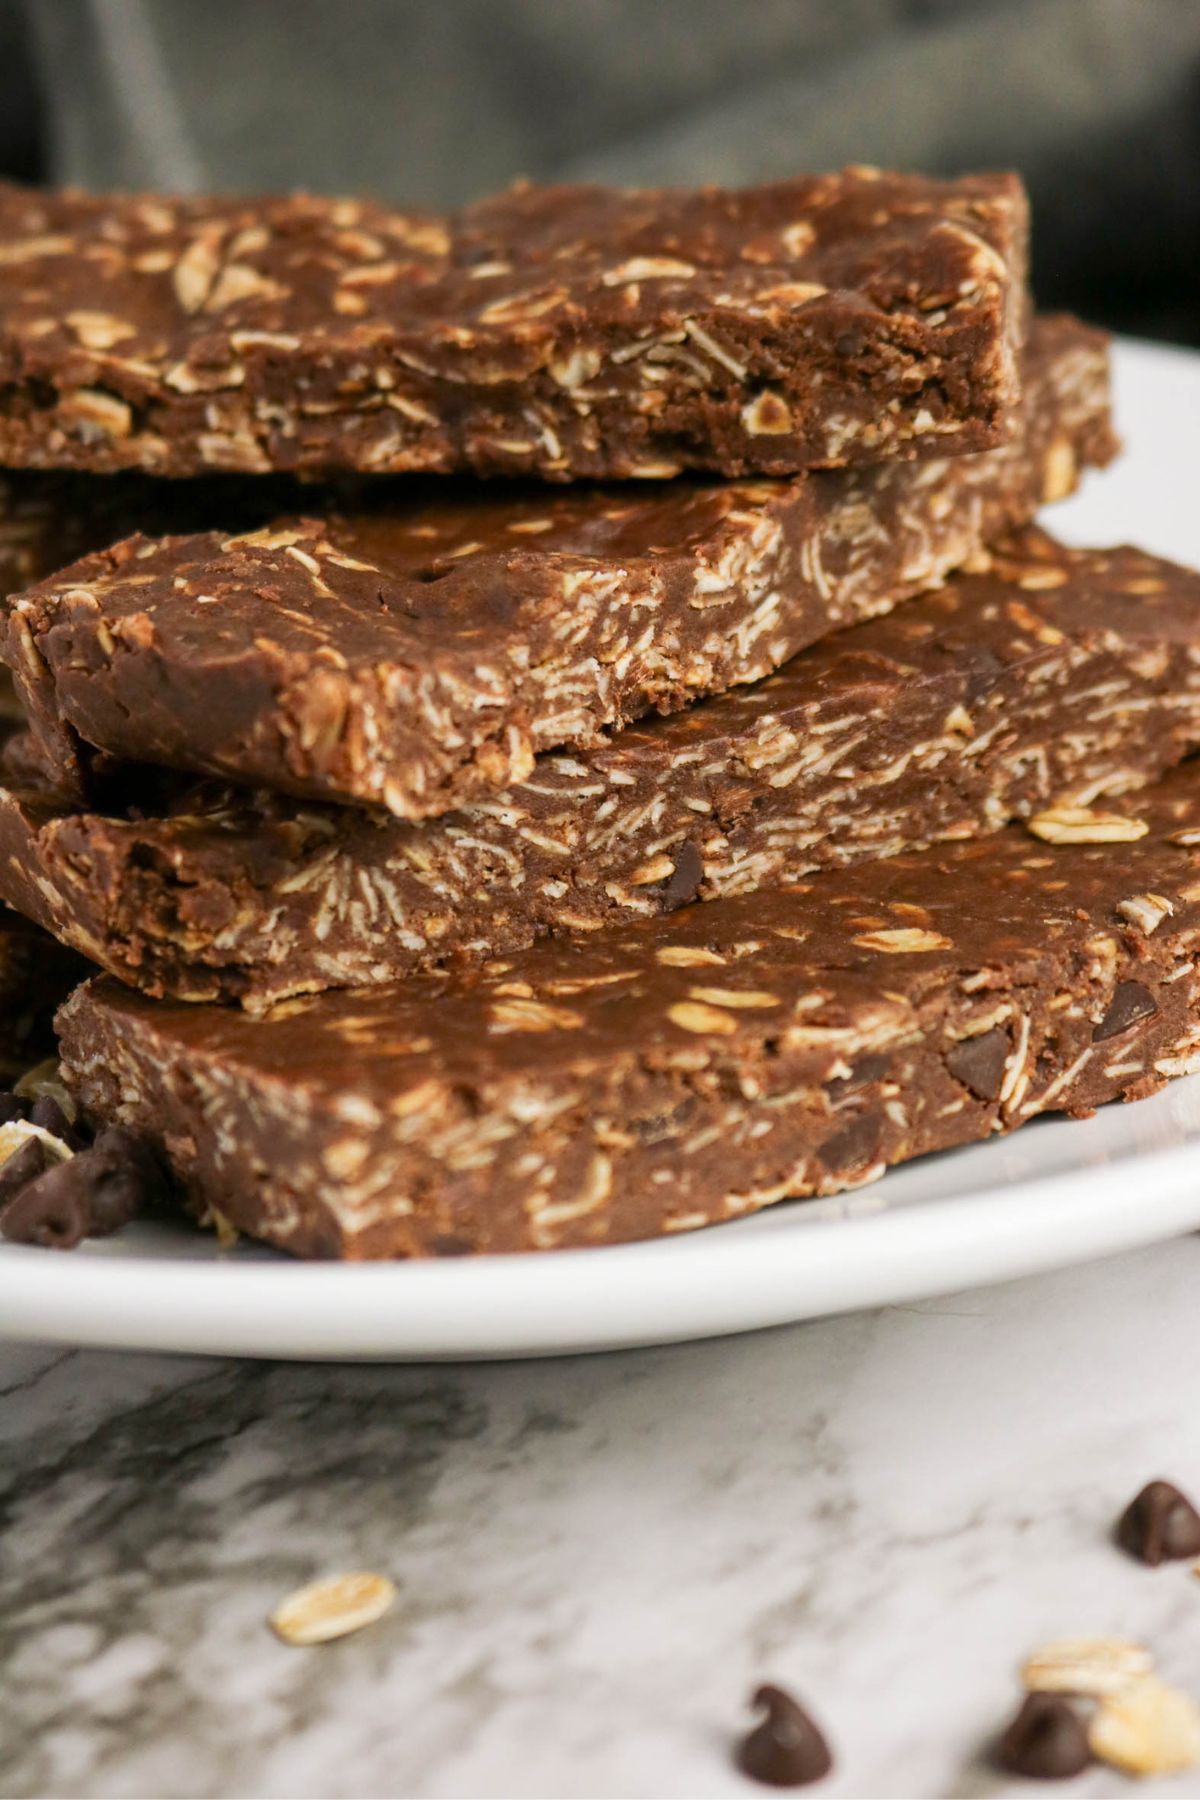
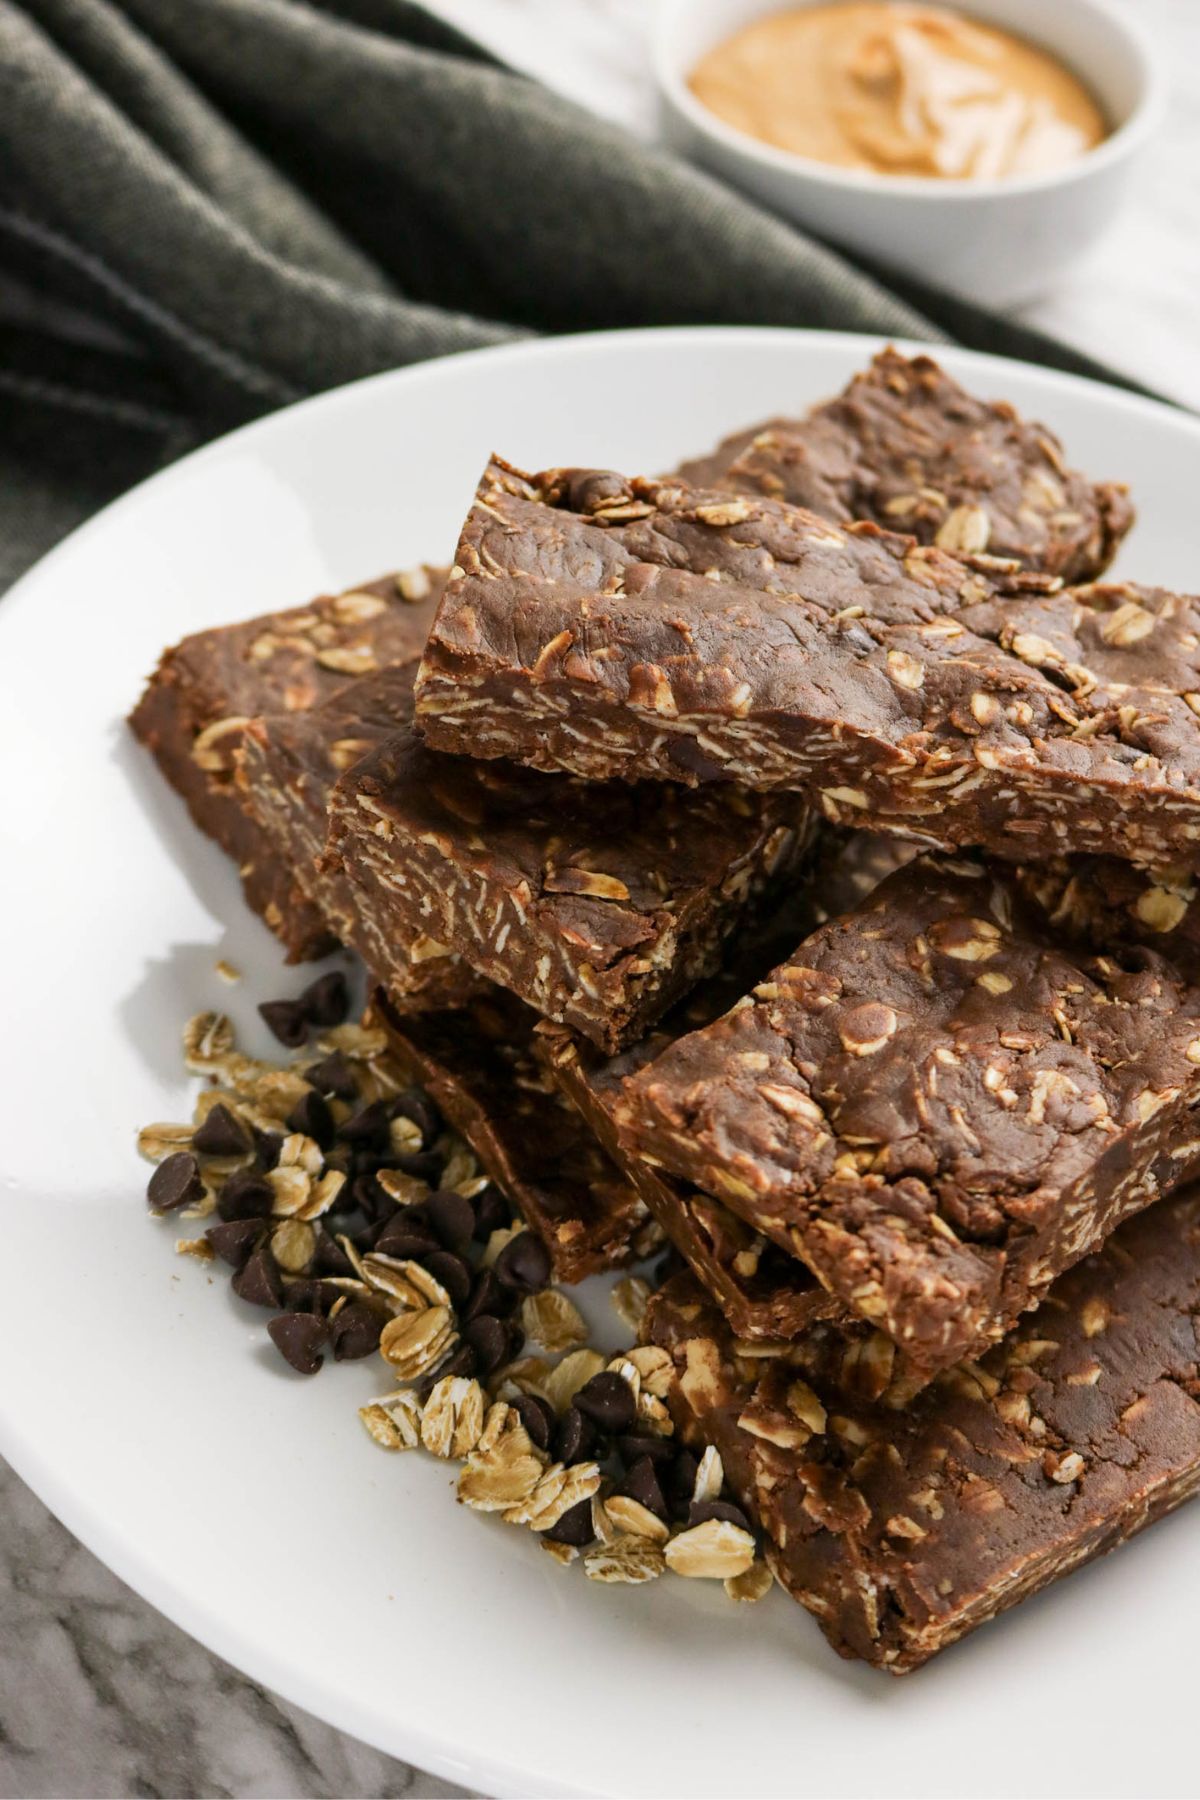
Peanut Butter and Chocolate Protein Bars
Peanut butter and chocolate protein bars are a no-bake, high-protein snack that tastes like a Reese’s cup without the guilt. They are thick, fudgy, and packed with real ingredients you can actually recognize. Keep a batch in the fridge all week for a quick post-workout treat or an afternoon snack that holds you over.
Why This Peanut Butter and Chocolate Protein Bars Recipe Works
Most store-bought protein bars are loaded with ingredients you cannot pronounce. This recipe uses reduced-fat peanut butter, rolled oats, and cocoa powder to create a bar that is satisfying and actually made from food. Unlike many copycat recipes, we skip the chocolate coating step entirely and fold cocoa powder right into the base so every bite is chocolatey without any extra work.
I found that pressing the mixture firmly and chilling it for the full hour is the secret to bars that hold their shape when you cut them. The protein powder and oats work together to give the bars structure without making them dry or chalky.
If you love high-protein snacks and treats, check out my Banana Protein Muffins or High Protein Pasta Salad for more ideas.
Recipe Summary
- 🍽️ Course: Snack / Dessert
- ⏱️ Cooking Time: 15 minutes prep plus 1 hour chill time
- 🍴 Servings: 10 bars
- 🍫 Flavor Profile: Rich, chocolatey, and nutty with a hint of sweetness.
- 🥜 Best Served With: A glass of cold milk, protein coffee, or fresh fruit on the side.
- 🧊 Make Ahead?: Yes, these bars are perfect for meal prep and keep well in the fridge for up to one week.
Ingredients
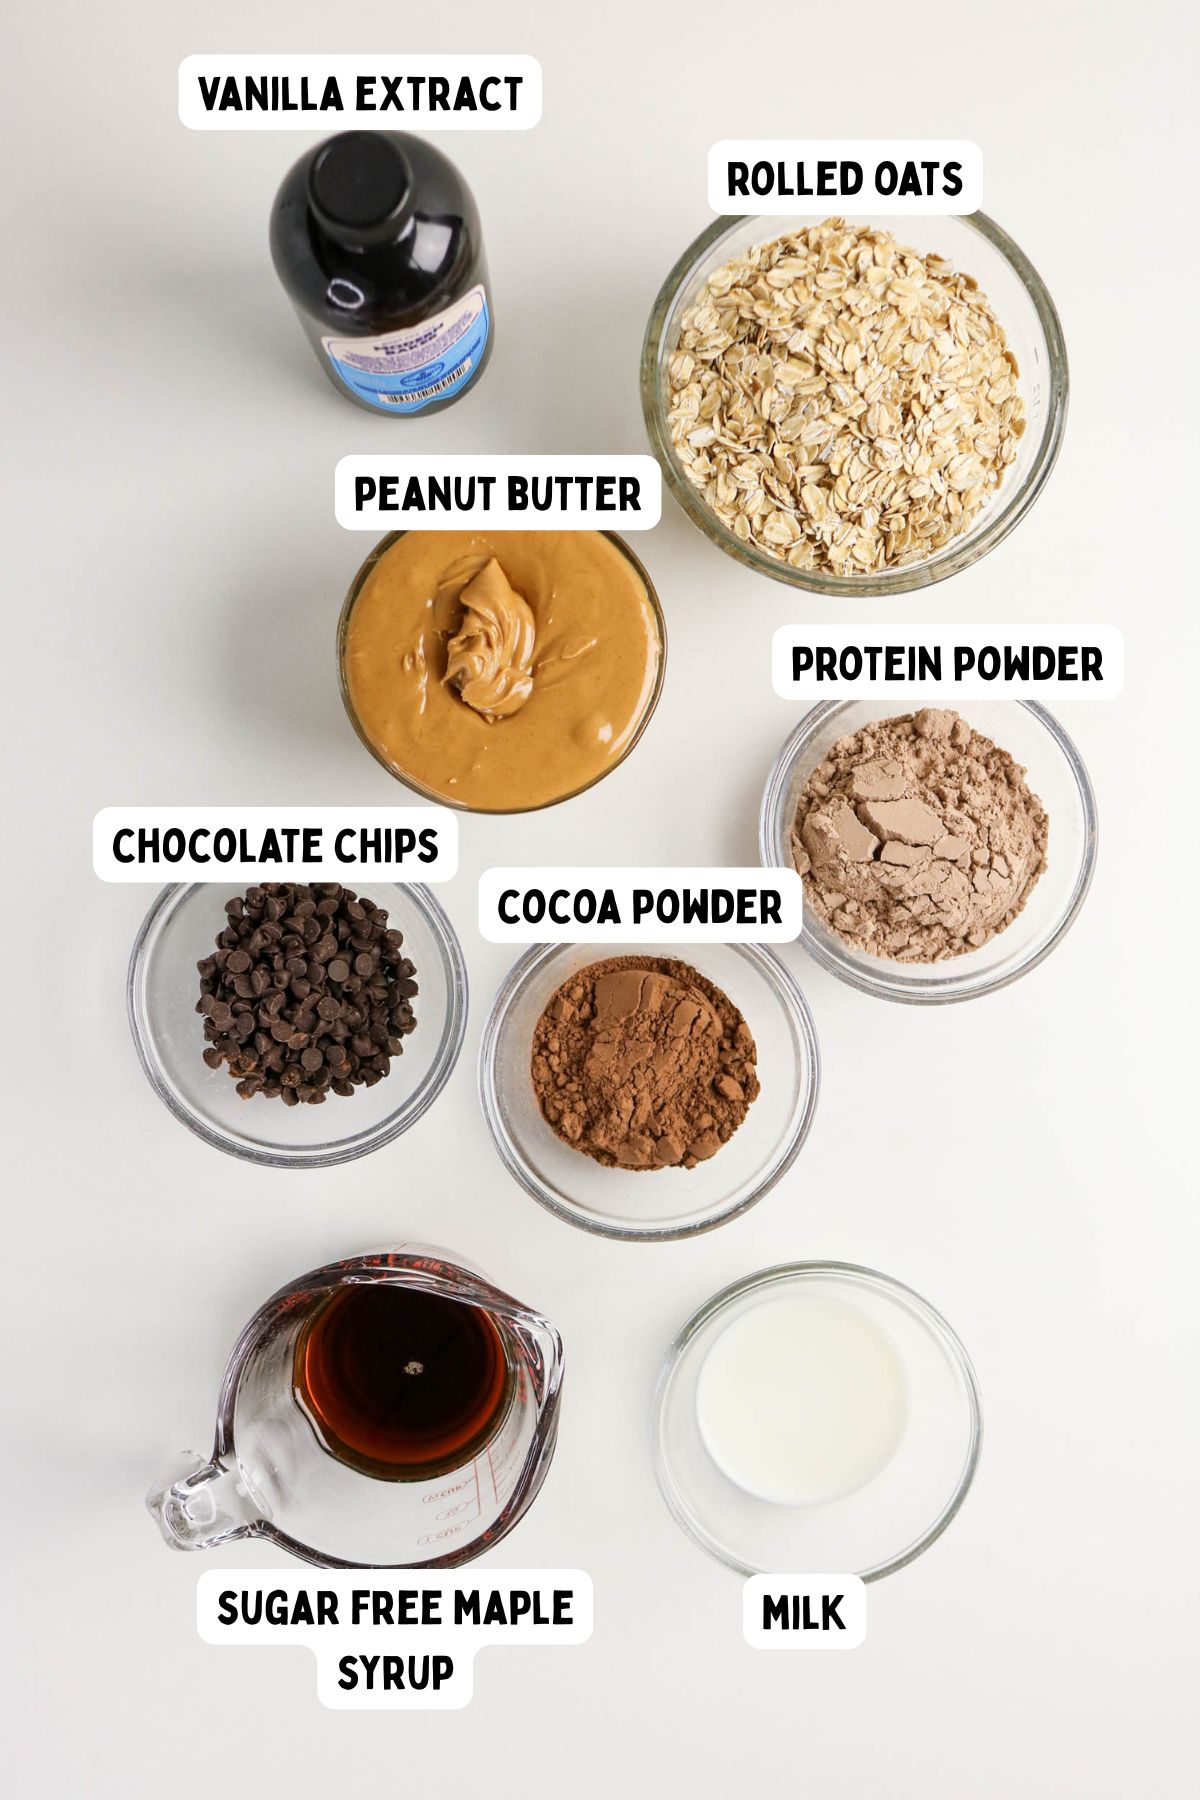
Here is a quick look at what you will need. You can find the full measurements in the recipe card below.
- Reduced-fat peanut butter — We use reduced-fat peanut butter to keep the calories in check. You can swap in regular natural peanut butter or almond butter if that is what you have on hand.
- Sugar-free maple syrup — This is the sweetener that holds the bars together. You can use regular maple syrup or honey if you do not need to keep them sugar-free.
- Vanilla extract — Use pure vanilla extract for the best flavor. Imitation vanilla will work in a pinch but the taste will be slightly different.
- Rolled oats — Old-fashioned rolled oats give the bars their chewy texture and structure. Do not use instant oats as they will make the bars too soft and mushy.
- Vanilla or chocolate protein powder — Use your favorite brand of protein powder. Both vanilla and chocolate work well. A plant-based or whey protein powder both give great results.
- Unsweetened cocoa powder — This is where the rich chocolate flavor comes from. Use regular unsweetened cocoa powder. Dutch-process cocoa will give a deeper, darker flavor if you want to switch it up.
- Fat-free milk — Add this one tablespoon at a time so you can control the texture. Any milk or milk alternative like almond milk or oat milk will also work here.
- Lily mini chocolate chips (optional) — These are sugar-free chocolate chips that add a fun melty texture. You can skip them or use any mini chocolate chip you prefer.
Tips for Making Chocolate Peanut Butter Protein Bars
- Use a runny peanut butter: Stiff peanut butter straight from the bottom of the jar makes the mixture hard to combine. Stir the jar well before measuring or microwave it for 15 seconds to loosen it up.
- Add milk slowly: The batter consistency changes a lot with just a small amount of liquid. Start with one tablespoon and mix fully before deciding if you need more.
- Press firmly and chill the full hour: The bars need that full chill time to firm up and hold their shape when you slice them. Rushing the chill step leads to bars that crumble apart when cut.
Common Mistakes to Avoid When Making Chocolate Peanut Butter Protein Bars
- Using too much protein powder: Protein powder absorbs moisture quickly and can make the bars dry and grainy if you overdo it. Stick to the amount in the recipe and only adjust if the batter feels too wet.
- Skipping the parchment paper: Without parchment, the bars stick to the pan and are very difficult to lift out in one piece. Line the pan before you start and let the excess hang over the sides so you can lift them out cleanly.
- Cutting straight from the fridge into warm pieces: Slicing bars right after pulling them from the cold can cause them to crack. Let the pan sit at room temperature for two to three minutes before cutting for cleaner slices.
How to Make This
These bars come together in just a few easy steps. No oven needed and no special equipment required.
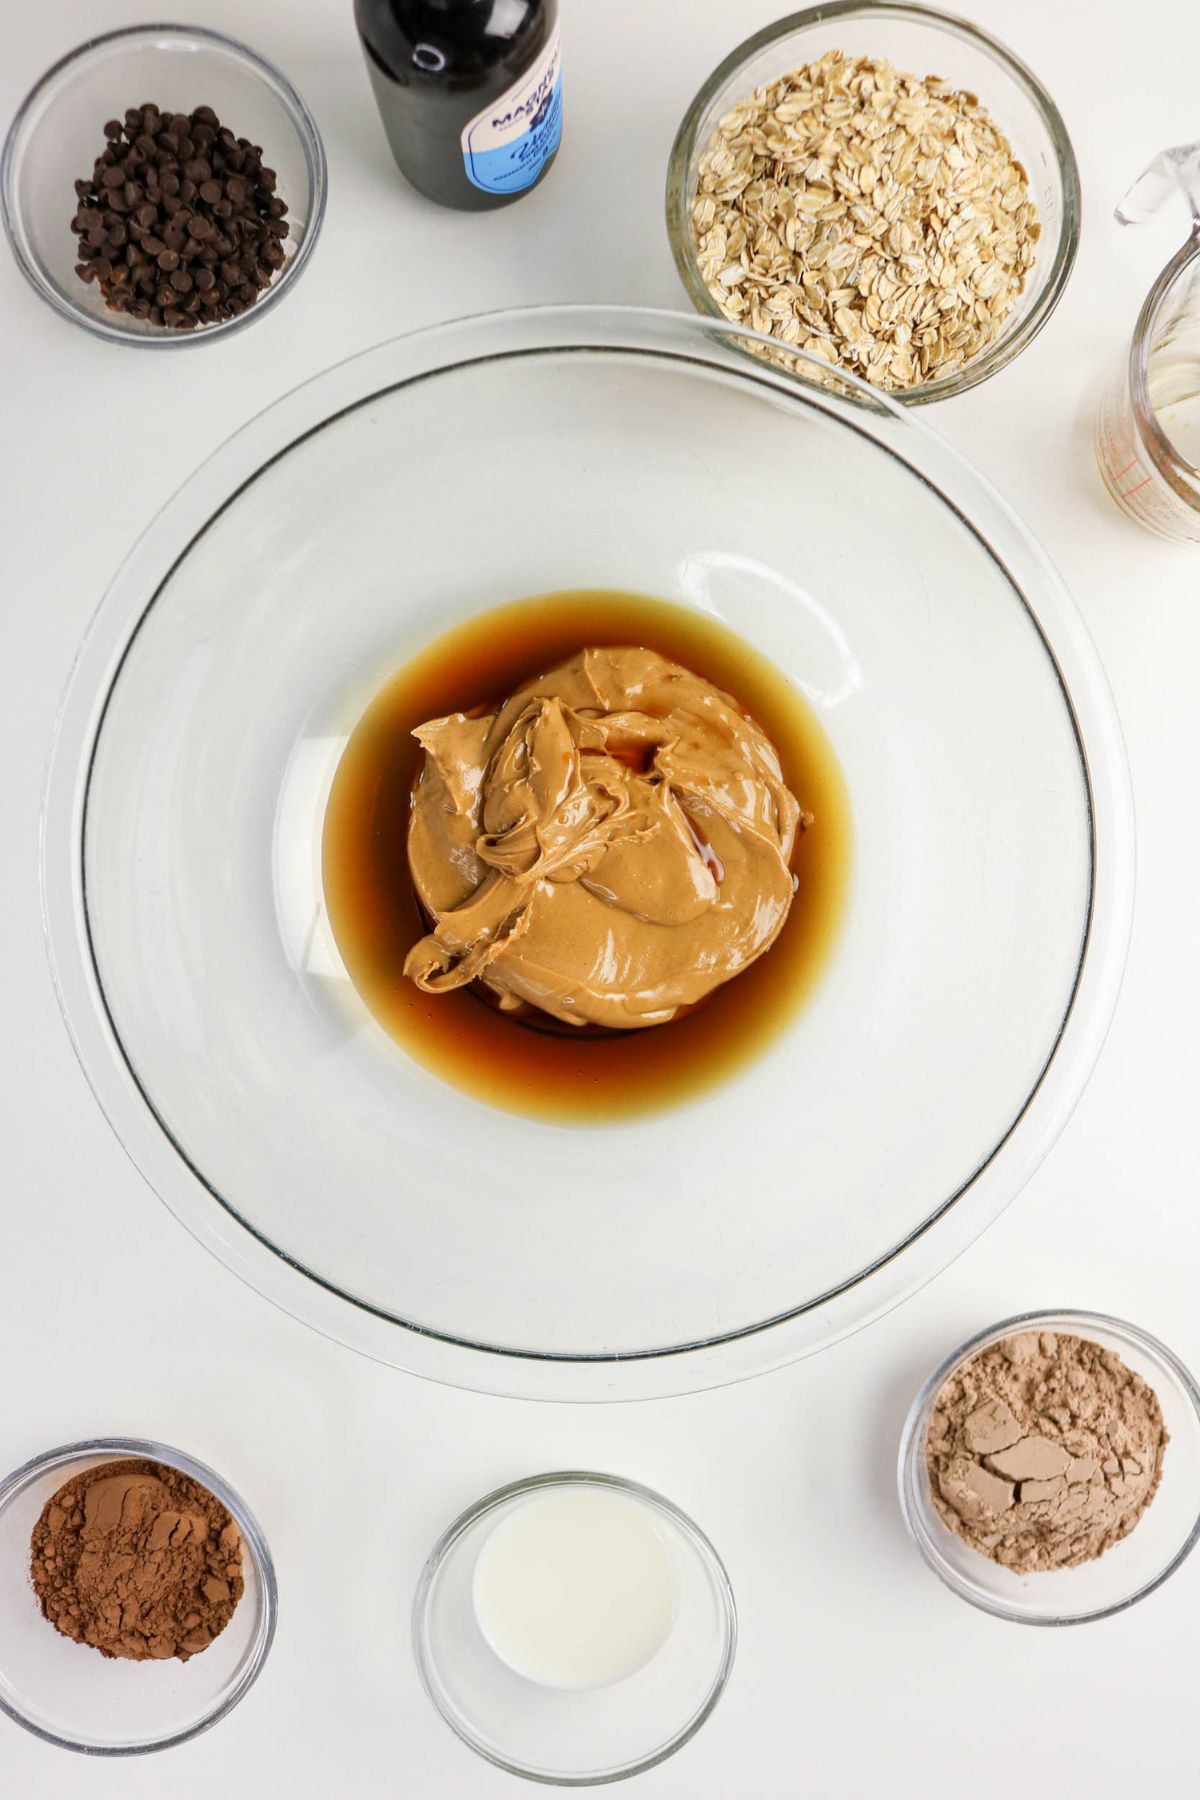
Step 1: Mix the wet ingredients. In a medium bowl, stir together the peanut butter, sugar-free maple syrup, and vanilla extract until the mixture is completely smooth.
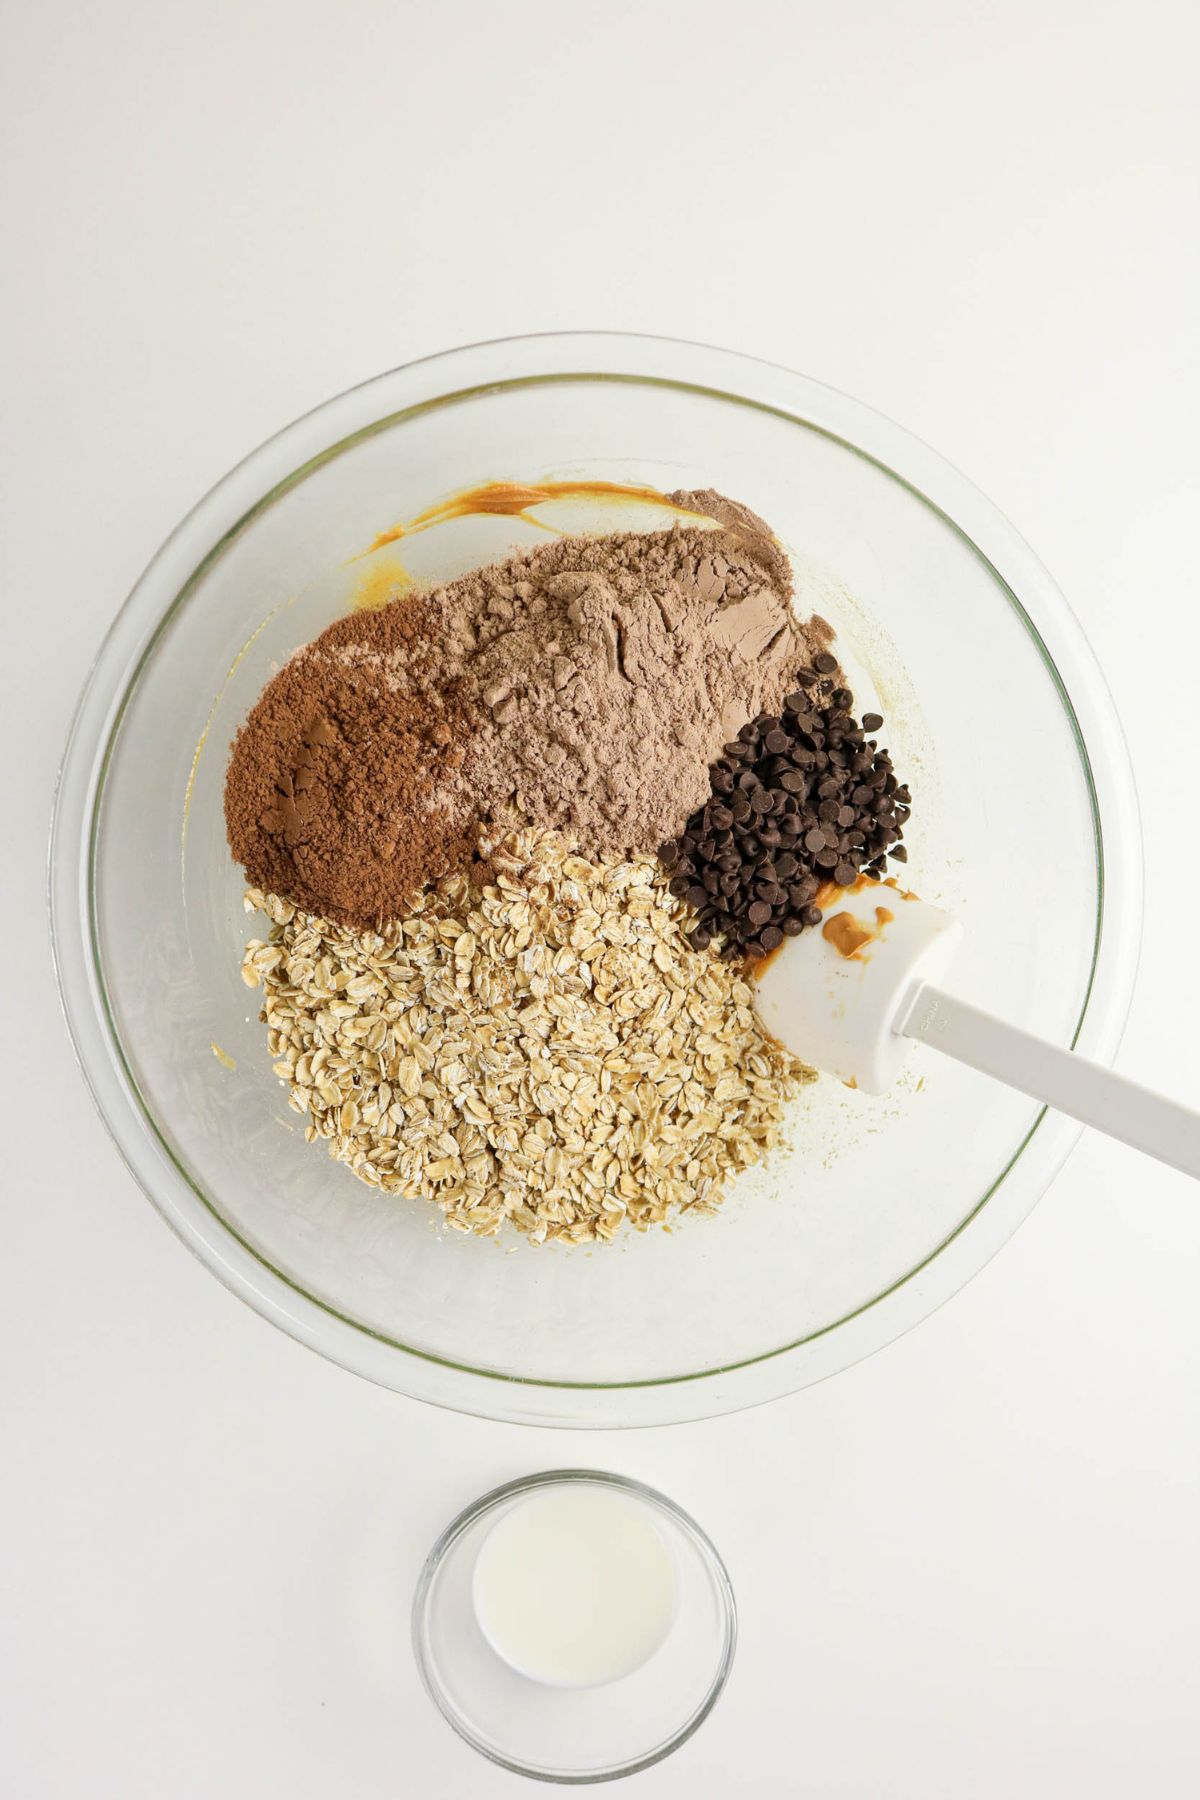
Step 2: Add the dry ingredients. Add the rolled oats, protein powder, cocoa powder, and optional chocolate chips to the bowl. Mix everything together until a thick dough forms.
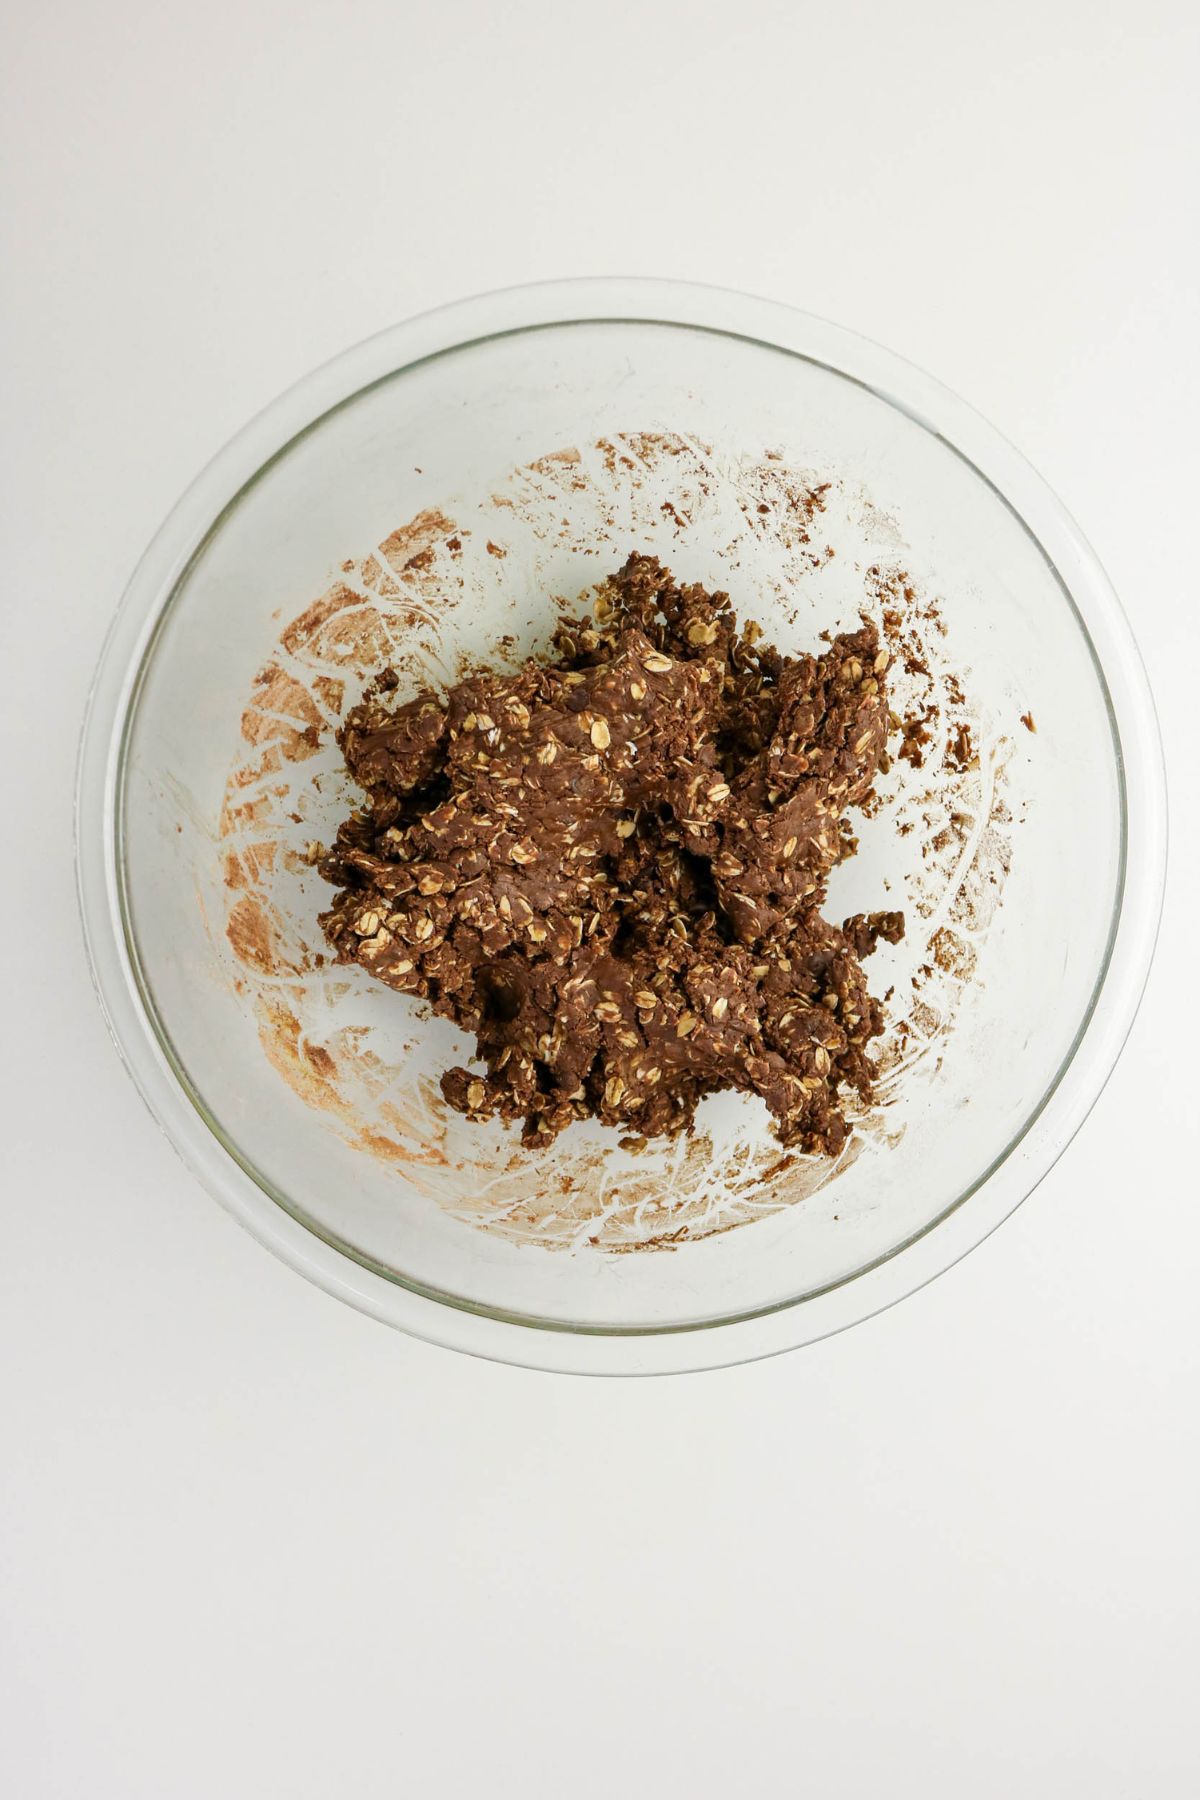
Step 3: Adjust the consistency. Stir in fat-free milk one tablespoon at a time until the mixture is thick but still pressable. You want it to hold together when you press it with your fingers.
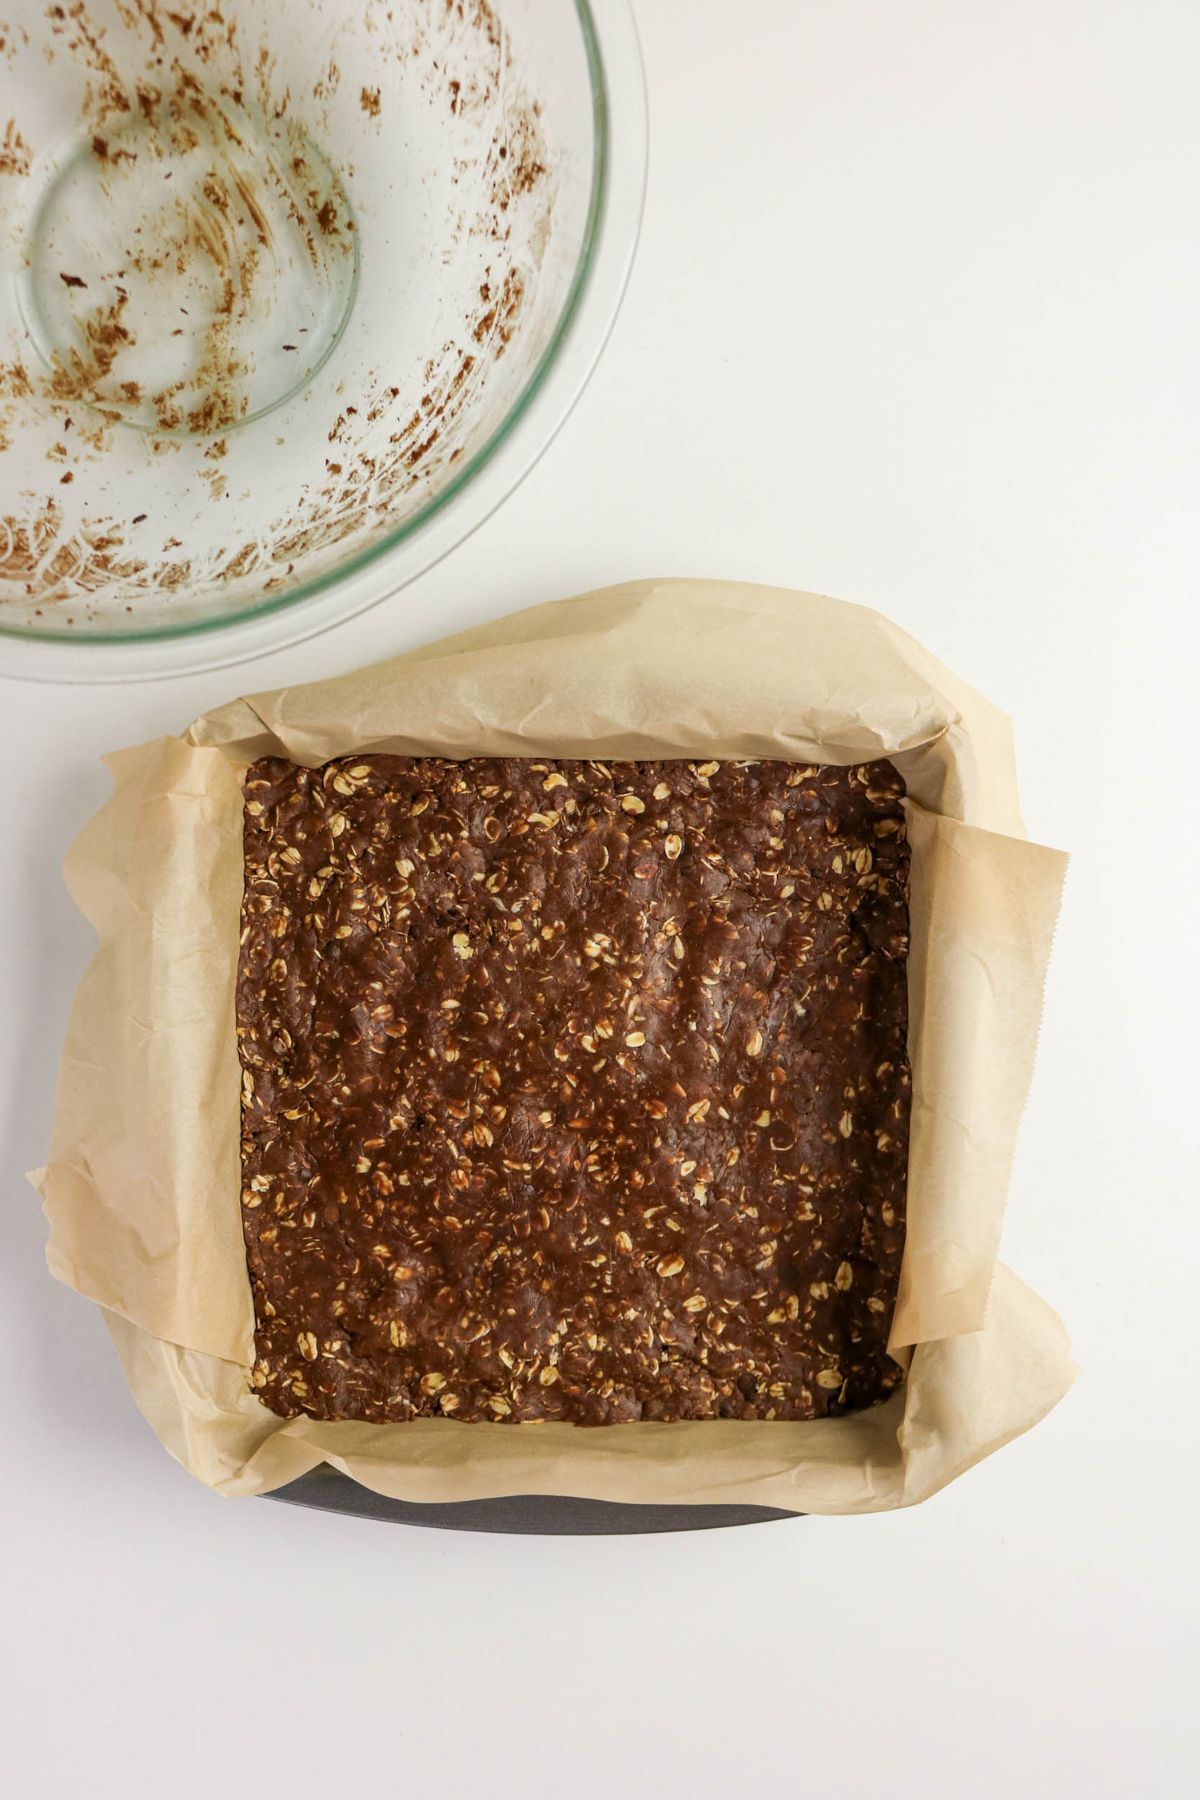
Step 4: Press and chill. Transfer the mixture to an 8×8-inch pan lined with parchment paper. Press it down firmly into an even layer. Refrigerate for at least one hour.
Recipe Tips
- Line your pan with parchment paper and let the edges overhang so you can lift the whole slab out without any sticking.
- If the dough feels too crumbly, add milk one tablespoon at a time and mix again until you get a texture that sticks together when pressed.
- For extra clean cuts, run your knife under warm water and wipe it dry between each slice.
- Store the bars in an airtight container in the refrigerator to keep them firm. They soften quickly at room temperature, especially in warm kitchens.
- Swap in chocolate protein powder for an even deeper chocolate flavor throughout the whole bar.
Serving Suggestions
- Pair a bar with my Protein Coffee Recipe for a filling breakfast that stays balanced and protein-focused. The extra protein helps make this a satisfying start to the day.
- Add a bar to lunch alongside an Egg Salad Wrap. The combination offers a balanced mix of protein, fiber, and something sweet to finish the meal.
- Enjoy one after dinner with a few Frozen Chocolate Dipped Strawberries. Both satisfy a sweet craving while keeping portions in check.
Frequently Asked Questions
Yes, almond butter or cashew butter both work well in this recipe. Keep in mind that different nut butters vary in thickness, so you may need to adjust the amount of milk to get the right consistency.
Yes, this recipe is easy to make gluten-free. Simply use certified gluten-free rolled oats and double-check that your protein powder is also gluten-free. The rest of the ingredients are naturally gluten-free.
Store the bars in an airtight container in the refrigerator for up to one week. To reheat or soften a cold bar, let it sit at room temperature for a few minutes before eating. For longer storage, place the bars in a freezer-safe container and freeze for up to three months. Thaw in the fridge overnight or let them sit out for about 10 minutes before serving.
Both vanilla and chocolate protein powder work great here. A whey-based or plant-based protein powder both give good results. Just avoid protein powders that have a very strong artificial flavor, as that can come through in the finished bars.
More Snack Recipe


Peanut Butter and Chocolate Protein Bars
Equipment
- 8×8-inch baking pan
- Parchment paper
- Medium mixing bowl
- Rubber spatula or wooden spoon
- Sharp knife for slicing
Ingredients
- 1 cup Reduced-fat peanut butter
- ⅓ cup sugar free maple syrup
- 1 teaspoon vanilla extract
- 1 ½ cups rolled oats
- ½ cup protein powder vanilla or chocolate
- ¼ cup unsweetened cocoa powder
- 2 tablespoons fat free milk dairy or non-dairy, as needed
- ¼ cup Lily mini chocolate chips
Instructions
- Line an 8×8-inch pan with parchment paper.
- In a medium bowl, stir together the peanut butter, honey (or maple syrup), and vanilla until smooth.
- Add the oats, protein powder, cocoa powder, and optional chocolate chips; mix until combined.
- Stir in milk one tablespoon at a time until the mixture is thick but pressable.
- Press the mixture firmly into the prepared pan in an even layer.
- Refrigerate for at least 1 hour, then lift out and cut into bars.
- Store bars in an airtight container in the refrigerator for up to 1 week, or freeze for longer storage.
Notes
- Let the bars chill completely before slicing for the cleanest edges.
- Use parchment paper with overhanging edges for easy removal from the pan.
- Stir the peanut butter mixture thoroughly before adding the dry ingredients.
- Cut into smaller squares for lower-calorie snack portions.
- Add a pinch of salt to enhance the chocolate flavor.
Disclaimer:
Any nutritional data I provide is an approximation and actual dietary information can vary based on ingredients and proportion sizes.